Simple GUIs with Rust
Published February 28, 2022
Rust is a fantastic language for many purposes and applications. It is performant, memory safe, and cross-platform. These attributes make it great for command-line utilities, libraries, and, theoretically, desktop applications. Unfortunately, the difficulty in building modern performant desktop interfaces has held Rust back in this space. Still, I’ve been interested in finding a solution to this problem, specifically for writing Linux desktop applications.
There are a couple of native rust GUI frameworks such as druid, iced, and others. I don’t want to discredit these projects, I think they are doing important work, and their frameworks could end up being the defacto standard for GUI-building in Rust. However, whenever I’ve tried to use these to build an application, the paradigms they forced were not logical to me.
Having a lot of experience writing web applications, I thought electron might’ve been worth a shot. I could write the interface with React and link it with Rust. With a bit of effort, this was working; the Javascript and Rust code worked together, building a somewhat decent application. This was the best solution I had found, but shipping a web browser with every app is anything but lightweight. I’ve also noticed that apps built with electron are generally looked down on in the Linux world, so though I can build electron apps it may not be the best path forward.
Of course, there are mature, modern, battle-tested GUI frameworks that already exist for Linux, namely GTK and QT. Messing around with gtk-rs proved very difficult, with gobject giving me more headaches than any GUI framework should ever warrant. A complete lack of experience with QT kept me from experimenting with it, but I always considered it as my best shot.
The wonderful world that is QT programming opened up to me when I read an article posted to Hacker News about constructing a simple file explorer with Rust and QML. The syntax was simple, there were no backward paradigms, and I quickly became excited once again about building applications with Rust.
Already familiar with Rust, I start progressing through QML tutorials. QML is a language for describing QT GUIs. It is entirely separate from Rust, allowing for developing the frontend of any app separately from the functional code.
As I delved more and more into this world, I found familiar concepts under a different guise. QML abstracts components through properties, signals, and slots, which I found to be very similar to writing React components. The main ideas are the same, such as state management and passing down callbacks.
Here is how I built my first Linux desktop application, a very simple calculator, with Rust and QML.
Design
When dealing with GUIs, I prefer to hash out the design in a wireframing app. This helps to define functionality and the user experience from the beginning, so I opened up Figma and created a pretty minimal design:
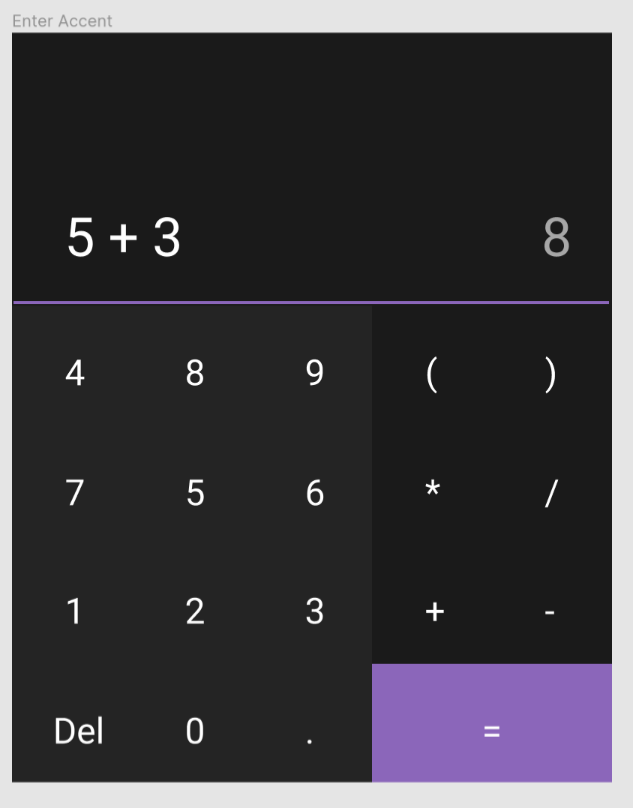
It’s a pretty derivative design, but at least it will be familiar to most anyone who would need to use it. The functionality is limited enough for quick developing time but not so trivial that you could implement it without understanding the tools themselves. The GUI is simple but modern, not relying on premade components, requiring custom styling, making it an excellent exercise to try out this tech stack.
UI
As I stated previously, you can develop nearly the entire GUI without writing
any of the functional “backend” code. So we can start with creating a new window in a file named Main.qml:
import QtQuick 2.15

Window {
    id: window

    visible: true
    width: 400
    height: 500
    title: "Calculator"

    color: "#1a1a1a"
}
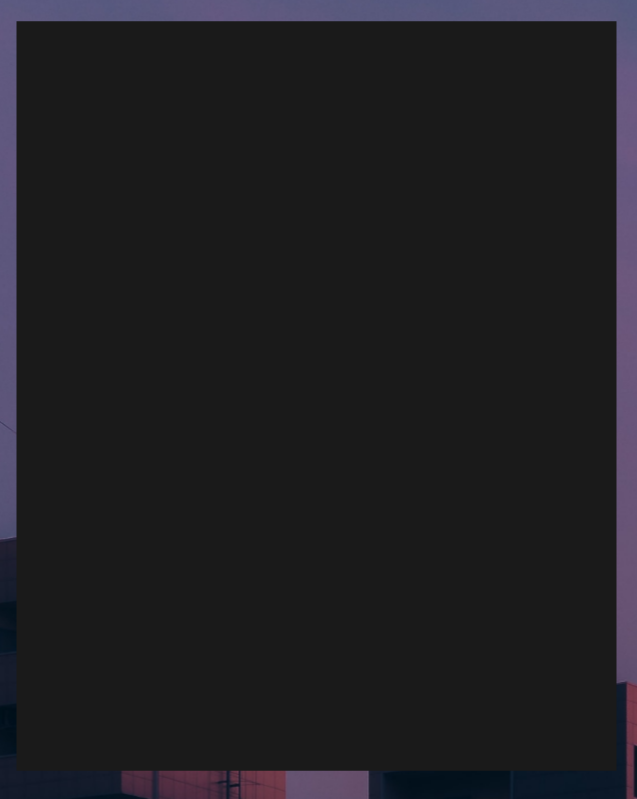
When run with qmlscene, it yields a nice looking blank window:
The next step is to get our layout in order. I use text components here to test that everything is working as intended:
import QtQuick 2.15
import QtQuick.Window 2.0
import QtQuick.Layouts 1.1

Window {
    id: window

    visible: true
    width: 400
    height: 500
    title: "Calculator"

    color: "#1a1a1a"

    GridLayout {
        anchors.fill: parent
        columns: 5

        Text {
			color: "#ffffff"
            text: "input"
            Layout.fillHeight: true
            Layout.fillWidth: true
            Layout.columnSpan: 5
            Layout.preferredHeight: 180
        }

        Text {
			color: "#ffffff"
            text: "a"
            Layout.fillWidth: true
            Layout.fillHeight: true
        }
        Text {
			color: "#ffffff"
            text: "a"
            Layout.fillWidth: true
            Layout.fillHeight: true
        }
        Text {
			color: "#ffffff"
            text: "a"
            Layout.fillWidth: true
            Layout.fillHeight: true
        }
        Text {
			color: "#ffffff"
            text: "a"
            Layout.fillWidth: true
            Layout.fillHeight: true
        }
        Text {
			color: "#ffffff"
            text: "a"
            Layout.fillWidth: true
            Layout.fillHeight: true
        }
        Text {
			color: "#ffffff"
            text: "a"
            Layout.fillWidth: true
            Layout.fillHeight: true
        }
        Text {
			color: "#ffffff"
            text: "a"
            Layout.fillWidth: true
            Layout.fillHeight: true
        }
        Text {
			color: "#ffffff"
            text: "a"
            Layout.fillWidth: true
            Layout.fillHeight: true
        }
        Text {
			color: "#ffffff"
            text: "a"
            Layout.fillWidth: true
            Layout.fillHeight: true
        }
        Text {
			color: "#ffffff"
            text: "a"
            Layout.fillWidth: true
            Layout.fillHeight: true
        }
        Text {
			color: "#ffffff"
            text: "a"
            Layout.fillWidth: true
            Layout.fillHeight: true
        }
        Text {
			color: "#ffffff"
            text: "a"
            Layout.fillWidth: true
            Layout.fillHeight: true
        }
        Text {
			color: "#ffffff"
            text: "a"
            Layout.fillWidth: true
            Layout.fillHeight: true
        }
        Text {
			color: "#ffffff"
            text: "a"
            Layout.fillWidth: true
            Layout.fillHeight: true
        }
        Text {
			color: "#ffffff"
            text: "a"
            Layout.fillWidth: true
            Layout.fillHeight: true
        }
        Text {
			color: "#ffffff"
            text: "a"
            Layout.fillWidth: true
            Layout.fillHeight: true
        }
        Text {
			color: "#ffffff"
            text: "a"
            Layout.fillWidth: true
            Layout.fillHeight: true
        }
        Text {
			color: "#ffffff"
            text: "a"
            Layout.fillWidth: true
            Layout.fillHeight: true
        }
        Text {
			color: "#ffffff"
            text: "a"
            Layout.fillWidth: true
            Layout.fillHeight: true
        }
        Text {
			color: "#ffffff"
            text: "a"
            Layout.fillWidth: true
            Layout.fillHeight: true
            Layout.columnSpan: 2
        }
    }
}
It’s pretty easy to see why a grid layout is well suited for a calculator, and QML’s grid layout has a couple of extra tricks that help us build a responsive design that can scale to different screen sizes. First, the Layout.columnSpan property allows a single item to span multiple columns, desirable for the input and the enter key.
The next trick is the Layout.preferredHeight property. I believe the grid layout takes the ratio of all the preferred
heights of all the different items and tries to divide up the available space. This is not how I’m using it. By only setting the preferred height of the input, it fills all open space, so the input will still be the correct size, but when the window’s height is grown or shrunk, only the input grows. I found this
behavior desirable, so I kept the trick in the layout.
Speaking of buttons, we need to build a button component to replace all these
text components. We want to customize the button color and text, and we need to react to button presses. This is what our Button.qml looks like:
import QtQuick 2.15
import QtQuick.Layouts 1.1

Rectangle {
    id: button
    property alias text: text.text
    property string buttonColor: "#242424"
    signal clicked()

    Layout.fillWidth: true
    Layout.preferredHeight: 80
    color: buttonColor

    MouseArea {
        id: mouseArea
        anchors.fill: parent
        onClicked: parent.clicked()
    }

    Text {
        id: text
        anchors.centerIn: parent
        color: "white"
        font.pointSize: 18
    }
}
We have our two inputs, text and color, as properties. The text property is an alias for the Text component’s text value, so it maps directly to it. We also define our signal, clicked, which any other component can listen to and act accordingly. We map it to the click event via the MouseArea onClicked callback.
One elegant feature of QML is the ability to add states and transitions. Each state can change the component’s properties, while each transition defines how to switch between states.
We can define different states for our buttons, such as “hover” and “click”, dependent on the mouseArea’s properties:
states: [
    State {
        name: "hover"
        when: mouseArea.containsMouse && !mouseArea.pressed
        PropertyChanges {
            target: button
            color: Qt.lighter(buttonColor, 1.1)
        }
    },
    State {
        name: "click"
        when: mouseArea.pressed
        PropertyChanges {
            target: button
            color: Qt.lighter(buttonColor, 1.3)
        }
    }
]
Now, whenever we hover over a button, the color will change. We can animate this with a transition:
transitions: Transitioon {
    ColorAnimation { duration: 100 }
}
The complete button file looks like this:
import QtQuick 2.15
import QtQuick.Layouts 1.1

Rectangle {
    id: button
    property alias text: text.text
    property string buttonColor: "#242424"
    signal clicked()

    Layout.fillWidth: true
    Layout.preferredHeight: 80
    color: buttonColor

    MouseArea {
        id: mouseArea
        anchors.fill: parent
        hoverEnabled: true
        onClicked: parent.clicked()
    }

    states: [
        State {
            name: "hover"
            when: mouseArea.containsMouse && !mouseArea.pressed
            PropertyChanges {
                target: button
                color: Qt.lighter(buttonColor, 1.1)
            }
        },
        State {
            name: "pressed"
            when: mouseArea.pressed
            PropertyChanges {
                target: button
                color: Qt.lighter(buttonColor, 1.3)
            }
        }
    ]

    transitions: Transition {
        ColorAnimation { duration: 100 }
    }

    Text {
        id: text
        anchors.centerIn: parent
        color: "white"
        font.pointSize: 18
    }
}
We can integrate this into our Main.qml file like so:
import QtQuick 2.15
import QtQuick.Layouts 1.1
import QtQuick.Window 2.0

Window {
    id: window

    visible: true
    width: 400
    height: 500
    title: "Calculator"

    GridLayout {
        anchors.fill: parent
        columns: 5
        columnSpacing: 0
        rowSpacing: 0

        // Input
        Rectangle {
            Layout.fillHeight: true
            Layout.fillWidth: true

            Layout.columnSpan: 5
            Layout.preferredHeight: 180

            color: "#1a1a1a"

            // Bottom Border
            Rectangle {
                width: parent.width
                height: 2
                anchors.bottom: parent.bottom
                color: "#c782ec"
            }
        }

        // Buttons
        Button { text: "7" }
        Button { text: "8" }
        Button { text: "9" }
        Button { text: "("; buttonColor: "#1a1a1a" }
        Button { text: ")"; buttonColor: "#1a1a1a" }
        Button { text: "4" }
        Button { text: "5" }
        Button { text: "6" }
        Button { text: "*"; buttonColor: "#1a1a1a" }
        Button { text: "/"; buttonColor: "#1a1a1a" }
        Button { text: "1" }
        Button { text: "2" }
        Button { text: "3" }
        Button { text: "+"; buttonColor: "#1a1a1a" }
        Button { text: "-"; buttonColor: "#1a1a1a" }
        Button { text: "Del" }
        Button { text: "0" }
        Button { text: "." }
        Button { text: "="; Layout.columnSpan: 2; buttonColor: "#c782ec" }
    }
}
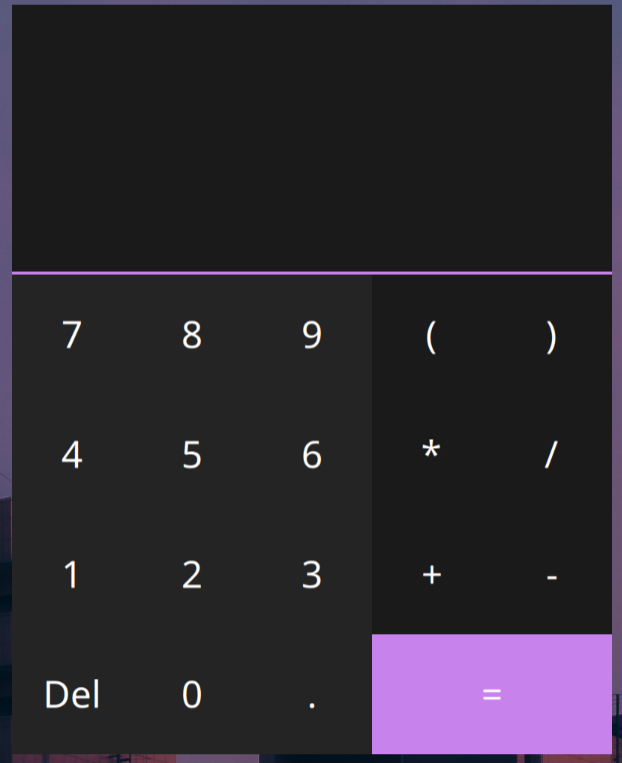
We now have a nice-looking but useless UI. The buttons don’t do anything, and we can’t input any text, so that’s what we will focus on next. We use a text input since we want to input text by typing or clicking buttons. Using the Textinput also allows for text to be selected, copied, pasted, etc., so we use this for the answer field as well:
TextInput {
    id: input
    width: parent.width
    color: "#ffffff"
    font.pointSize: 24
    anchors.left: parent.left
    anchors.bottom: parent.bottom
    anchors.leftMargin: 32
    anchors.bottomMargin: 16
    selectByMouse: true
    selectionColor: "#c782ec"

    validator: RegularExpressionValidator {
        regularExpression: /[0-9\-+*/.\(\)]*/
    }

    MouseArea {
        anchors.fill: parent
        cursorShape: Qt.IBeamCursor
        acceptedButtons: Qt.NoButton
    }
}

TextInput {
    id: resultText

    text: "8"
    color: "#a7a7a7"
    font.pointSize: 24
    anchors.right: parent.right
    anchors.bottom: parent.bottom
    anchors.rightMargin: 32
    anchors.bottomMargin: 16
    readOnly: true
    selectByMouse: true
    selectionColor: "#c782ec"

    MouseArea {
        anchors.fill: parent
        cursorShape: Qt.IBeamCursor
        acceptedButtons: Qt.NoButton
    }
}
The only strange thing in here is the inclusion of the MouseArea. You must include a MouseArea that doesn’t accept input to change the cursor shape. Strange.
A helpful feature of QML’s Textinputs is the validation field. If the user tries to input a character that doesn’t match the regular expression, it rejects it, leaving the input unchanged.
The last step is to handle our buttons clicked signal to modify the input text:
Button { text: "7"; onClicked: {input.text += "7"} }
Button { text: "8"; onClicked: {input.text += "8"} }
Button { text: "9"; onClicked: {input.text += "9"} }
Button {
    text: "("
    onClicked: {input.text += "("}
    buttonColor: "#1a1a1a"
}
Button {
    text: ")"
    onClicked: {input.text += ")"}
    buttonColor: "#1a1a1a"
}
Button { text: "4"; onClicked: {input.text += "4"} }
Button { text: "5"; onClicked: {input.text += "5"} }
Button { text: "6"; onClicked: {input.text += "6"} }
Button {
    text: "*"
    onClicked: {input.text += "*"}
    buttonColor: "#1a1a1a"
}
Button {
    text: "/"
    onClicked: {input.text += "/"}
    buttonColor: "#1a1a1a"
}
Button { text: "1"; onClicked: {input.text += "1"} }
Button { text: "2"; onClicked: {input.text += "2"} }
Button { text: "3"; onClicked: {input.text += "3"} }
Button { text: "+"; buttonColor: "#1a1a1a"; onClicked: {input.text += "+"}}
Button { text: "-"; buttonColor: "#1a1a1a"; onClicked: {input.text += "-"}}
Button {
    text: "Del"
    onClicked: {
        input.text = input.text.slice(0, input.text.length-1)
    }
}
Button { text: "0"; onClicked: {input.text += "0"} }
Button { text: "."; onClicked: {input.text += "."} }
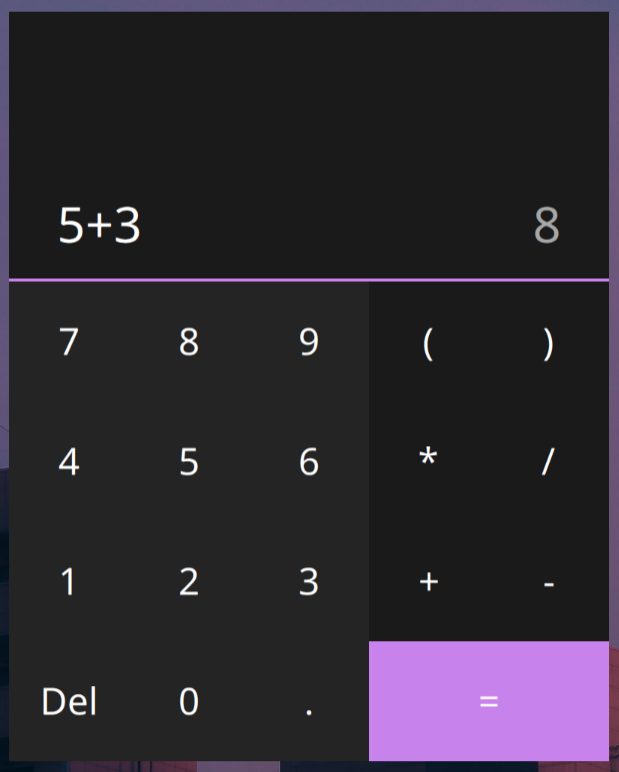
Putting this all together, we have a functional calculator GUI with working input buttons:
Backend
The actual calculation will take the input string and return the answer as a floating-point number. We need to build a parser that can read the input into a parse tree. For more information on defining grammars and writing parsers, check out my article on the subject.
The grammar that I settled on was this:
<expr> ::= <addExpr>
<expr> ::= <addExprEnd>
<expr> ::= <multExprEnd>

<addExpr> ::= <multExpr> <addExprEnd>
<addExpr> ::= <multExpr>

<addExprEnd> ::= + <multExpr>
<addExprEnd> ::= - <multExpr>

<multExpr> ::= <baseExpr> <multExprEnd>
<multExpr> ::= <baseExpr>

<multExprEnd> ::= * <baseExpr>
<multExprEnd> ::= / <baseExpr>

<baseExpr> ::= ( <addExpr> )
<baseExpr> ::= NUM
<expr> can take either a fully formed expression, expressed via <addExpr>, or the end of a multiplicative or additive expression. The result is that
inputs such as “+1” will be accepted, which we will interpret as the last result
plus 1.
The main trick of this grammar is that it maintains operator precedence - an additive expression checks for multiplicative expressions, which checks for parentheses or a number. This cascading effect means that we will always parse the operations correctly, and our tree will implicitly keep that precedence.
I’m omitting the construction of the lexer and parser, but again you can check out my other article for more details on what that process looks like, or check out the source code here.
However, I will show the computation step, converting our parse tree to the result. The computation relies on shared behavior among our parse tree types, so we define the following trait:
pub trait Comput {
    // last is the result of the last operation
    fn compute(&self, last: f32) -> f32;
}
We can go through each of our parse tree types and define the compute operation:
impl Compute for Expr {
     fn compute(&self, last: f32) -> f32 {
         match self {
             Self::Add(add) => add.compute(last),
             Self::AddEnd(add) => last + add.compute(last),
             Self::MultEnd(mult) => last * mult.compute(last)
         }
     }
}

impl Compute for AddExpr {
    fn compute(&self, last: f32) -> f32 {
        self.0.compute(last) + self.1.clone()
            .map(|e| e.compute(last))
            .unwrap_or(0.0)
    }
}

impl Compute for AddExprEnd {
    fn compute(&self, last: f32) -> f32 {
        match self {
            Self::Add(prod, end) => {
                prod.compute(last) + end.clone()
                    .map(|e| e.compute(last))
                    .unwrap_or(0.0)
            },
            Self::Sub(prod, end) => {
                -prod.compute(last) + end.clone()
                    .map(|e| e.compute(last))
                    .unwrap_or(0.0)
            },
        }
    }
}

impl Compute for MultExpr {
    fn compute(&self, last: f32) -> f32 {
        let base = self.0.compute(last);
        base * self.1.clone().map(|e| e.compute(last)).unwrap_or(1.0)
    }
}

impl Compute for MultExprEnd {
    fn compute(&self, last: f32) -> f32 {
        match self {
            Self::Mult(base, end) => {
                base.compute(last) * end.clone()
                    .map(|e| e.compute(last))
                    .unwrap_or(1.0)
            },
            Self::Div(base, end) => {
                1.0 / base.compute(last) * end.clone()
                    .map(|e| e.compute(last))
                    .unwrap_or(1.0)
            },
        }
    }
}

impl Compute for BaseExpr {
    fn compute(&self, last: f32) -> f32 {
        match self {
            Self::Num(n) => *n,
            Self::Paren(expr) => expr.compute(last)
        }
    }
}
We have finished all the rust code to parse and compute the value of the calculator input.
Integrating Rust and QML
To integrate our rust code with the QML, we need to accomplish a few tasks:
- Start the QML from Rust
- When the enter key is clicked, send the input string to the Rust code.
- Compute the value from the input string
- Send the result to the result Textinput
Starting the QML
The rust library qmetaobject handles all of the work for interfacing with QT; its interface is straightforward:
use qmetaobject::prelude::*;

fn main() {
    let mut engine = QmlEngine::new();

    engine.load_file("ui/Button.qml".into());
    engine.load_file("ui/Main.qml".into());

    engine.exec();
}
The engine reads our UI files from the disk and starts the GUI application.
I attempted to find a
way to embed the UI files into the binary using the include_str! macro, but
the engine was unable to link Main.qml and Button.qml, so we are loading
the files when we start the application.
Accepting Input
To accept input, we need to create a QML component with a slot, effectively a function, which takes a string and runs the computation. We create and register the following type:
use cstr::cstr;
use qmetaobject::prelude::*;

#[derive(QObject, Default)]
pub struct Calculator {
    base: qt_base_class!(trait QObject),
    compute: qt_method!(fn compute(&mut self, input: String) {
        println!("{input}");
    })
}

fn main() {
    qml_register_type::<Calculator>(
        cstr!("Calculator"),
        1,
        0,
        cstr!("Calculator")
    );

    engine.load_file("ui/Button.qml");
    engine.load_file("ui/Main.qml");

    engine.exec();
}
We can then add the Calculator component to our Main.qml and file, and call compute whenever the enter key is pressed:
import Calculator: 1.0

Window {
    // ...

    Calculator {
        id: calculator
    }

    // ...
}
// Hook into TextInput Accept State
TextInput {
    id: input
    onAccepted: {
        calculator.compute(text)
    }
}
// When the enter key is pressed also call compute
Button {
    text: "="
    buttonColor: "#c782ec"
    Layout.columnSpan: 2
    onClicked: {
        calculator.compute(input.text)
    }
}
So now we call compute, and our input prints to the console.
Computing the Result
To compute the result, we need the current input and the last result, so we modify our Calculator struct to store the previously calculated value when we call compute:
struct Calculator {
    base: qt_base_class!(trait QObject),
    last_result: Option<f32>,
    compute: qt_method!(fn compute(&mut self, input: String) {
        let last = self.last_result.unwrap_or(0.0);
        let tree = if let Some(tree) = parse(&input) { tree } else {return;};

        let num = tree.comput(last);
        self.last_result = Some(num);

        println!("{num}");
    })
}
Our calculator mostly works; we just need to link the result to resultText.
Retrieving the Result
We want our QML code to be able to access the result, so we need to add two things: a property to store the result and a signal to notify them that the result has changed:
struct Calculator {
    base: qt_base_class!(trait QObject),
    result: qt_property!(QString; NOTIFY result_changed),
    result_changed: qt_signal!(),
    last_result: Option<f32>,
    compute: qt_method!(fn compute(&mut self, input: String) {
        let last = self.last_result.unwrap_or(0.0);
        let tree = if let Some(tree) = parse(&input) { tree } else {return;};

        let num = tree.comput(last);
        self.last_result = Some(num);

        self.set_result(num.to_string().into());
    })
}

impl Calculator {
    fn set_result(&mut self, s: QString) {
        self.result = s;
        self.result_changed();
    }
}
Now any component in our QML can read the result. Let’s link it to our result field:
Calculator {
    id: calculator

    onResultChanged: {
        resultText.text = result
        input.text = ""
    }
}
That’s It! A working calculator using QML and Rust.
Conclusion
Learning QML had its growing pains, but in the end, I admired how simply I was able to define the UI. I hope to use this stack to build high-quality cross-platform desktop applications in the future.
As always, the entire source code for this article is available on my Github. If you have any comments, questions, or corrections, please reach out to me at devin@vstelt.dev. Thanks for reading!